This article explains how to add one or more cases to a patient record. This allows you to associate multiple cases with a patient, rather than adding a patient for each new case.
To perform the following procedures, open the Patient Manager.
Create a Case
- Select a Patient from the list on the left.
- Click on [View Cases] or anywhere in the bottom-left inside the Cases box.
The right side of the Patient Manager changes to display case information. - Click [New Case] on the toolbar.
The New Case Wizard opens.

- Click Next, then enter a Case ID and select a Case Type (Private, EHC, MVA, Slip & Fall, WSIB, or OHIP).
- The Intake Date defaults to the current date, change it if necessary. Optionally, choose the Referral for the patient case.

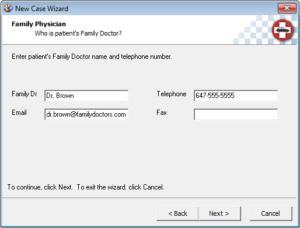
- Click Next and enter information about the patient’s Family Doctor.
- Click Next and enter information about the patient’s Legal Representative (for all but WSIB cases).

- Complete the fields specific to the Case Type, as described in the table below, then click Finish.


| Case Type | Fields |
|---|---|
| EHC Case | -Insurance company details (select or add) -Insurance company billing address and phone numbers (select or add) -Claim form (select) -Plan/Group and ID/Certificate numbers -Name and DOB of plan member (if different from patient) |
| MVA Case | -EHC case details, as above -Insurance company details (select or add) -Insurance company billing address and phone numbers (select or add) -Claim and Policy numbers -Name of plan member (if different from patient) -HCAI Insurance name (select) and ID (enter) -HCAI Branch name (select) and ID (enter) -Adjuster information (company, claim number, contact details) |
| OHIP | Note: The patient record must include a valid OHIP number before you can create this kind of case. -EHC case details, as above |
| Private Case | No additional fields required |
| Slip & Fall | -EHC case details, as above -Slip & Fall Claim and File No. |
| WSIB | -WSIB Claim No. -Adjuster information (adjustor, case manager, phone numbers) -EHC case details, as above |
Print Folder Label
Folder labels can be printed for Avery® 2224 file folder labels.
- Select a Patient from the list on the left.
- Select the Case for which you want to print a Folder Label.
- Click the arrow next to [Print] on the toolbar and select Folder Label.
The Patient Folder Label window opens, pre-populated with information from the Patient Record.

- Choose whether you want the Label to show the Patient ID or File (case) number.
Note: By default, patient information is printed three times per Label. If necessary, choose one or two Positions to print. - Click Preview.
A preview of the Folder Label opens, from here you can print the Label or export it to PDF.
Print Rehab Patient Case Profile
- Select a Patient from the list on the left.
- Select the Case for which you want to print a Case Profile.
- Click the arrow next to [Print] on the toolbar and select Case Profile (Rehab).
A preview of the Patient Case Profile opens, pre-populated with information from the Patient Record, from here you can print the Label or export it to PDF.
Print Assessment Patient Case Profile
- Select a Patient from the list on the left.
- Select the Case for which you want to print a Case Profile.
- Click the arrow next to [Print] on the toolbar and select Case Profile (Assessment).
A preview of the Patient Case Profile opens, pre-populated with information from the Patient Record, from here you can print the Label or export it to PDF.
Print Fax Cover Page
- Select a Patient from the list on the left.
- Select the Case for which you want to print a Fax Cover Page.
- Click the arrow next to [Print] on the toolbar and select Fax Cover Page.
The Select Fax Type window opens.
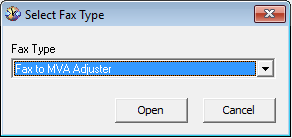
- Select the appropriate Fax Type and click Open.
The Fax to… form opens.
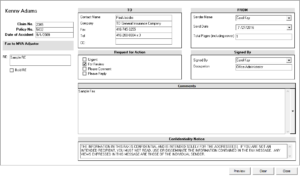
- Enter whatever additional information is needed for the fax, then click Preview.
A preview of the Fax Cover opens, pre-populated with information from the Patient Record, from here you can print the Fax Cover or export it to PDF.

Deactivate and Reactivate Case
- Select a Patient from the list on the left.
- Select the Case you want to deactivate or reactivate.
- Click [Edit Case] on the toolbar.
- Change the Status to Active or Inactive.
- Click [Save Case] on the toolbar.
Edit Case Details
- Select a Patient from the list on the left.
- Select the Case you want to edit.
- Click [Edit Case] on the toolbar.
- Make the necessary changes and click [Save Case] on the toolbar.
Delete Case
Note: You are required to enter user password and have appropriate permissions in order to delete a case.
- Select a Patient from the list on the left.
- Select the Case you want to delete.
- Click [Delete Case] on the toolbar.
- Click Yes when prompted.